Despite efforts to cover the fundamentals of event creation in Google Tag Manager (GTM), we've noticed a consistent stream of queries across various platforms regarding the implementation of GA4 event tracking through GTM. In this blog post, we aim to address these concerns comprehensively. We'll clarify the importance of GA4 event tracking via GTM, highlight its role in resolving potential issues, and equip you with practical and efficient techniques to streamline the process. By the end of this post, you'll have a clearer understanding of why this integration is essential, how it can troubleshoot common challenges, and actionable strategies to implement it effectively.
Let's dive in!
Why do we need to learn about GA4 GTM event creation?
To clarify, there isn't necessarily a single, inherent problem with needing to learn about GA4 GTM event creation. It depends on your specific context and goals.
However, some potential challenges exist that learning about GTM event creation can help address:
For website owners and marketers:
- Lack of user behavior insights: You might be struggling to understand what users do on your website, leading to difficulty optimizing website experience and marketing campaigns.
- Inability to measure campaign effectiveness: You might be unsure which marketing efforts are driving conversions and ROI, making it hard to allocate resources effectively.
- Generic user experience: You might be offering a one-size-fits-all experience, missing opportunities to personalize based on user behavior and increase engagement.
- Data privacy concerns: You might be worried about complying with data privacy regulations without proper control over website tracking data.
For web developers and analysts:
- Reliance on developers for tracking changes: Frequent requests to developers for adding tracking snippets can slow down workflows and create bottlenecks.
- Slow deployment and testing of tracking updates: Modifying website code for each tracking change can be time-consuming and hinder testing agility.
Inconsistent data collection: Managing tracking across different tools and platforms manually can lead to inconsistencies and inaccurate data.
GTM Account Setup and Sample Variable Data Identification
Okay, so now that we have a better understanding of why we need to focus on this, especially if you are new in GA4 tracking - we’ll go straight ahead to the steps. In this example we'll be setting an event tracking for the CTA button on our Analytics Mates website called “BOOK A FREE CONSULTATION”.

I’m assuming that you already have an idea on how to create a GTM Account and Container. Also, how to install GTM on your website. If not, then you can check GTM’s documentation on this matter. We’ll be working on making a more compelling guide in the future. Once everything is set up, access your GTM account.
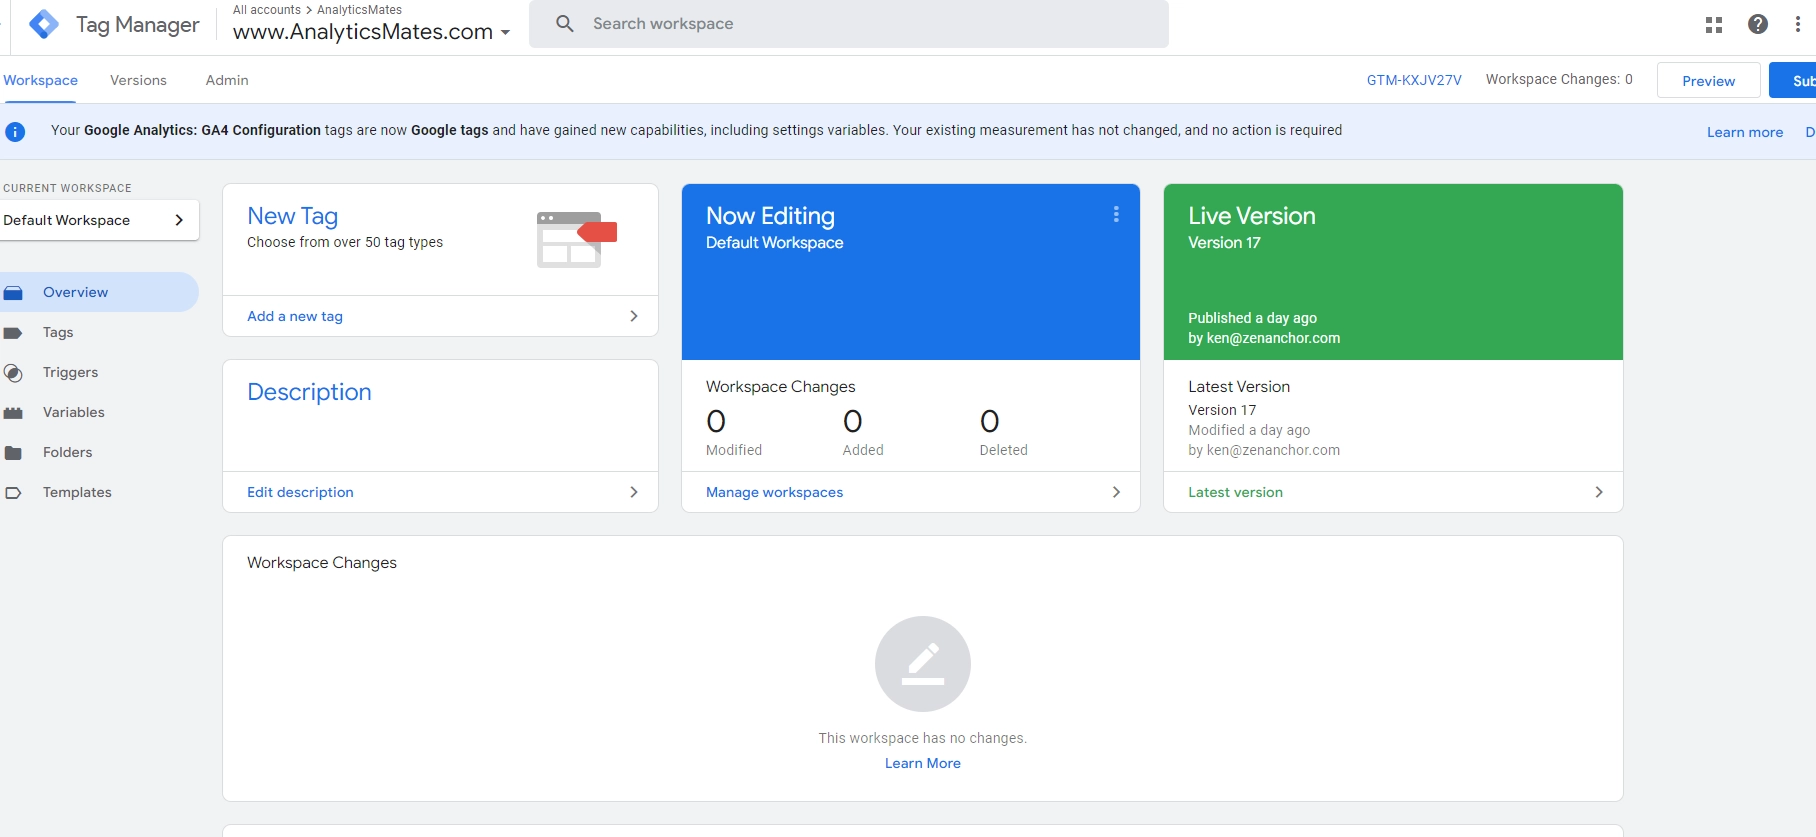
1. On the top right corner of the page, click “Preview”.

2. Enter your website address, in this example it’s “https://www.analyticsmates.com/” and click Connect
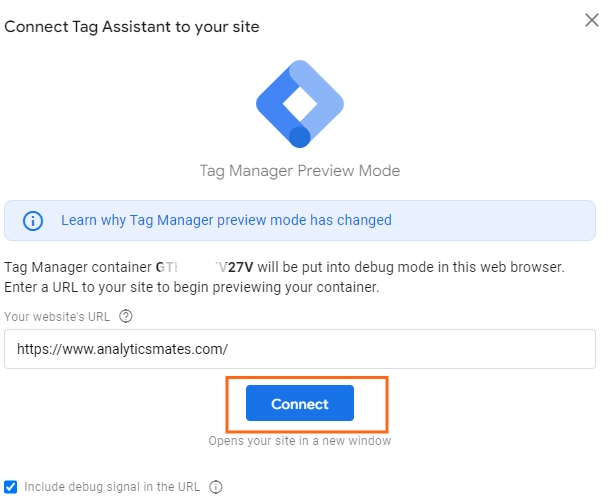
3. On the tagassistant you’ll be presented with this page:
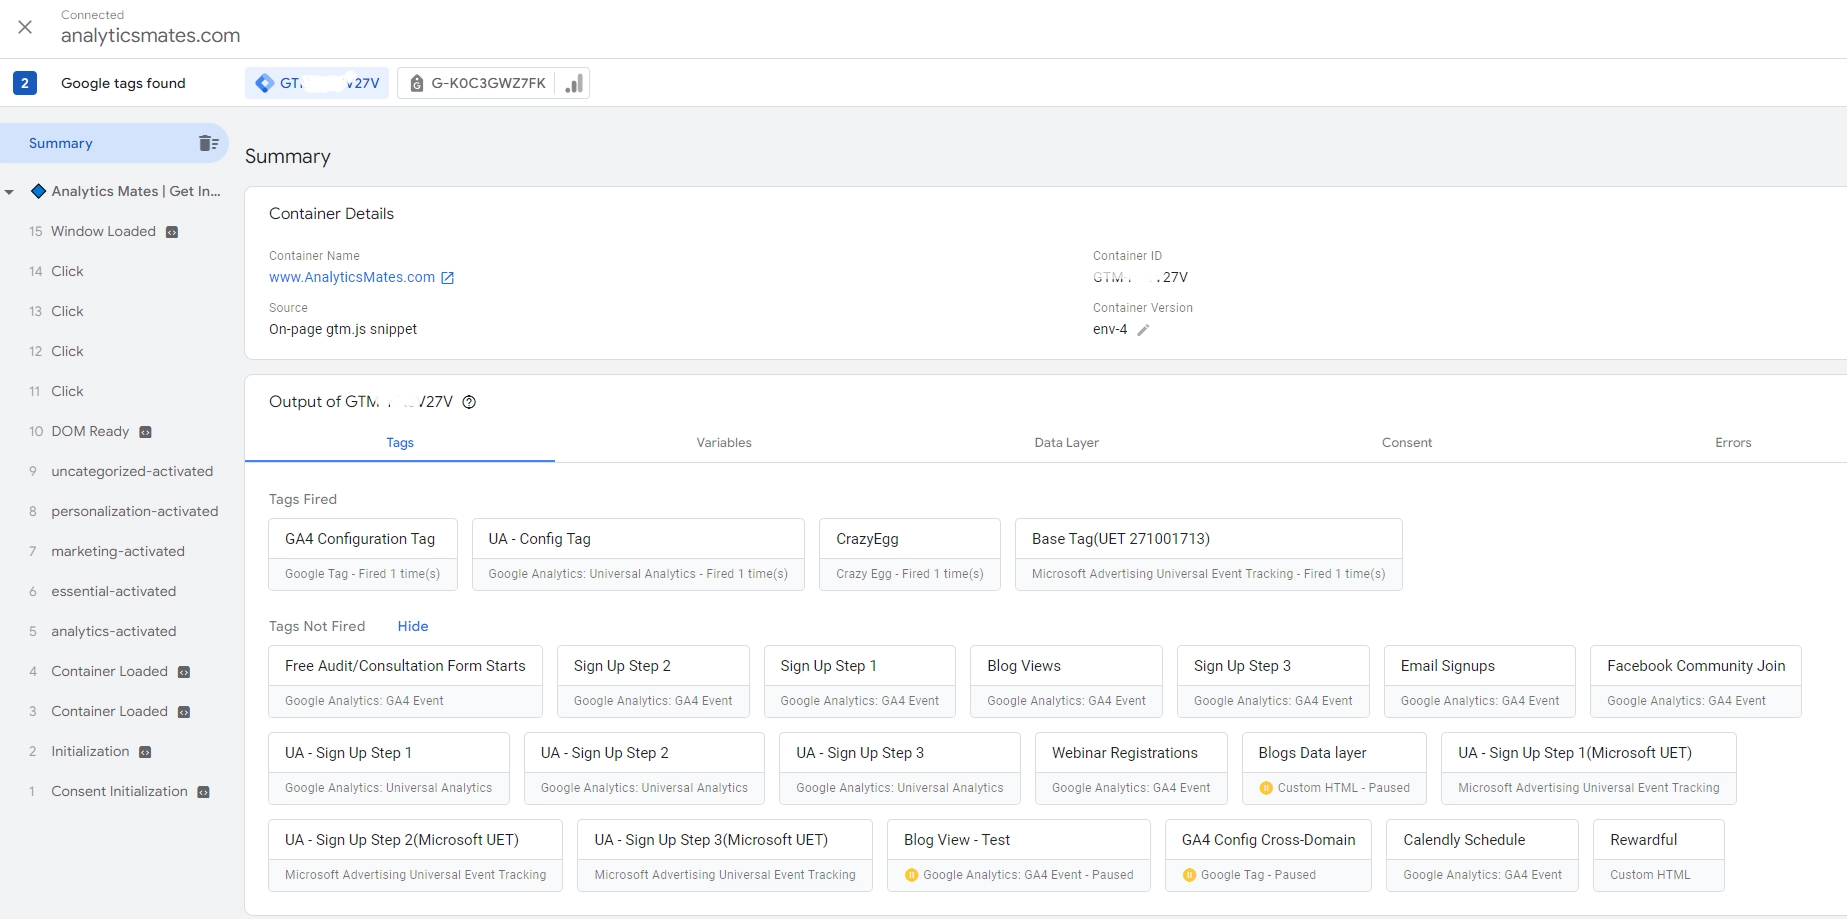
It shows all recent event tags at the bottom of the page. Left section shows user interaction from the website. If a user clicks on a particular link or button on the page, that interaction will appear in the left section.
Our Goal here is to get the website element that we can use to create an event tag in GTM. In this case we are going to track the CTA called “BOOK A FREE CONSULTATION”.
4. On the debug page, just click on the CTA (button or link) that you want to track.
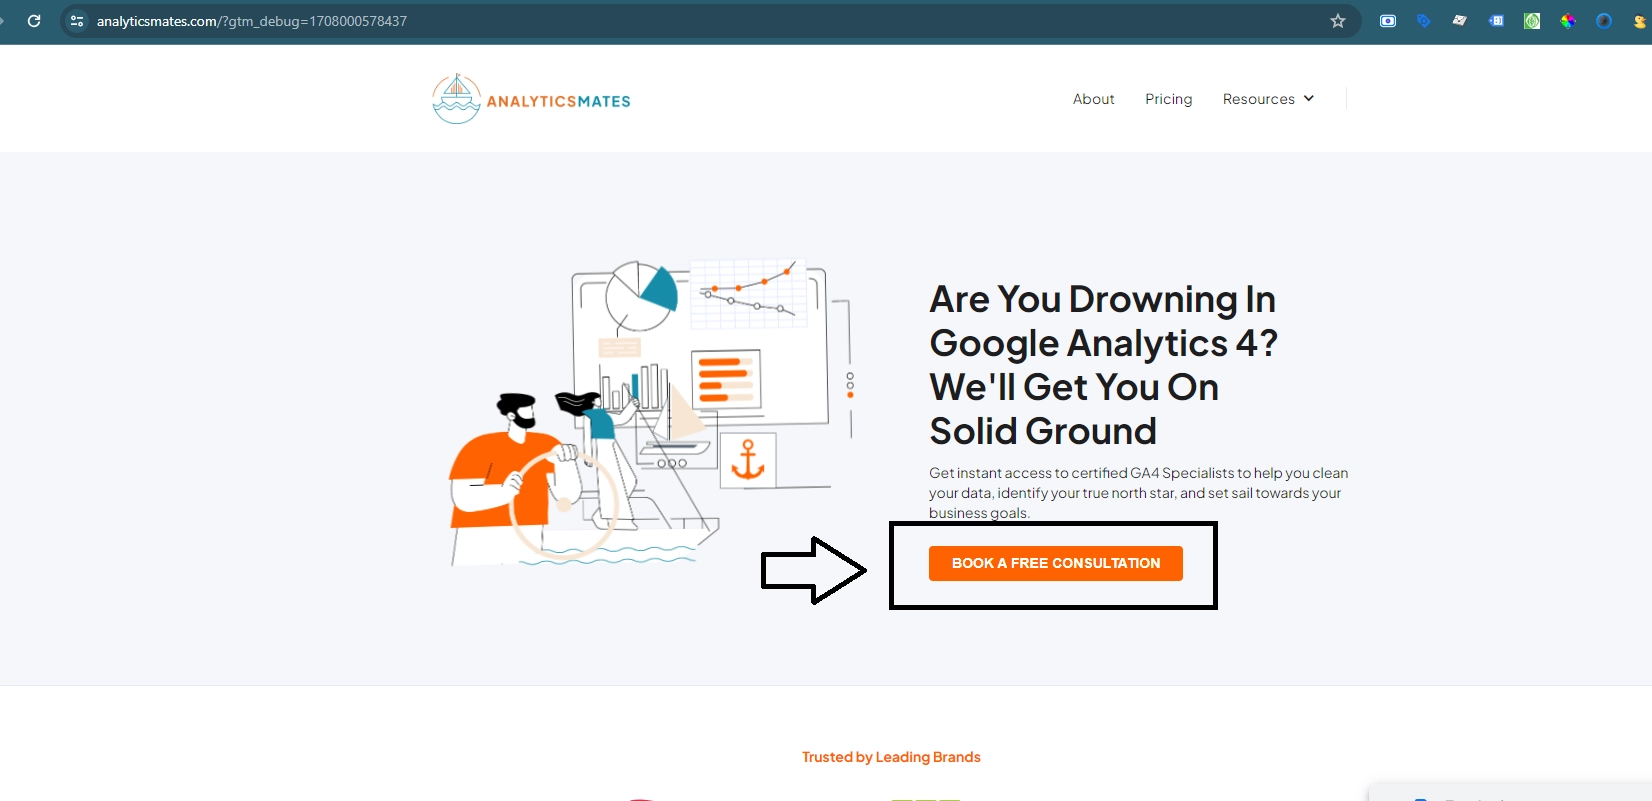
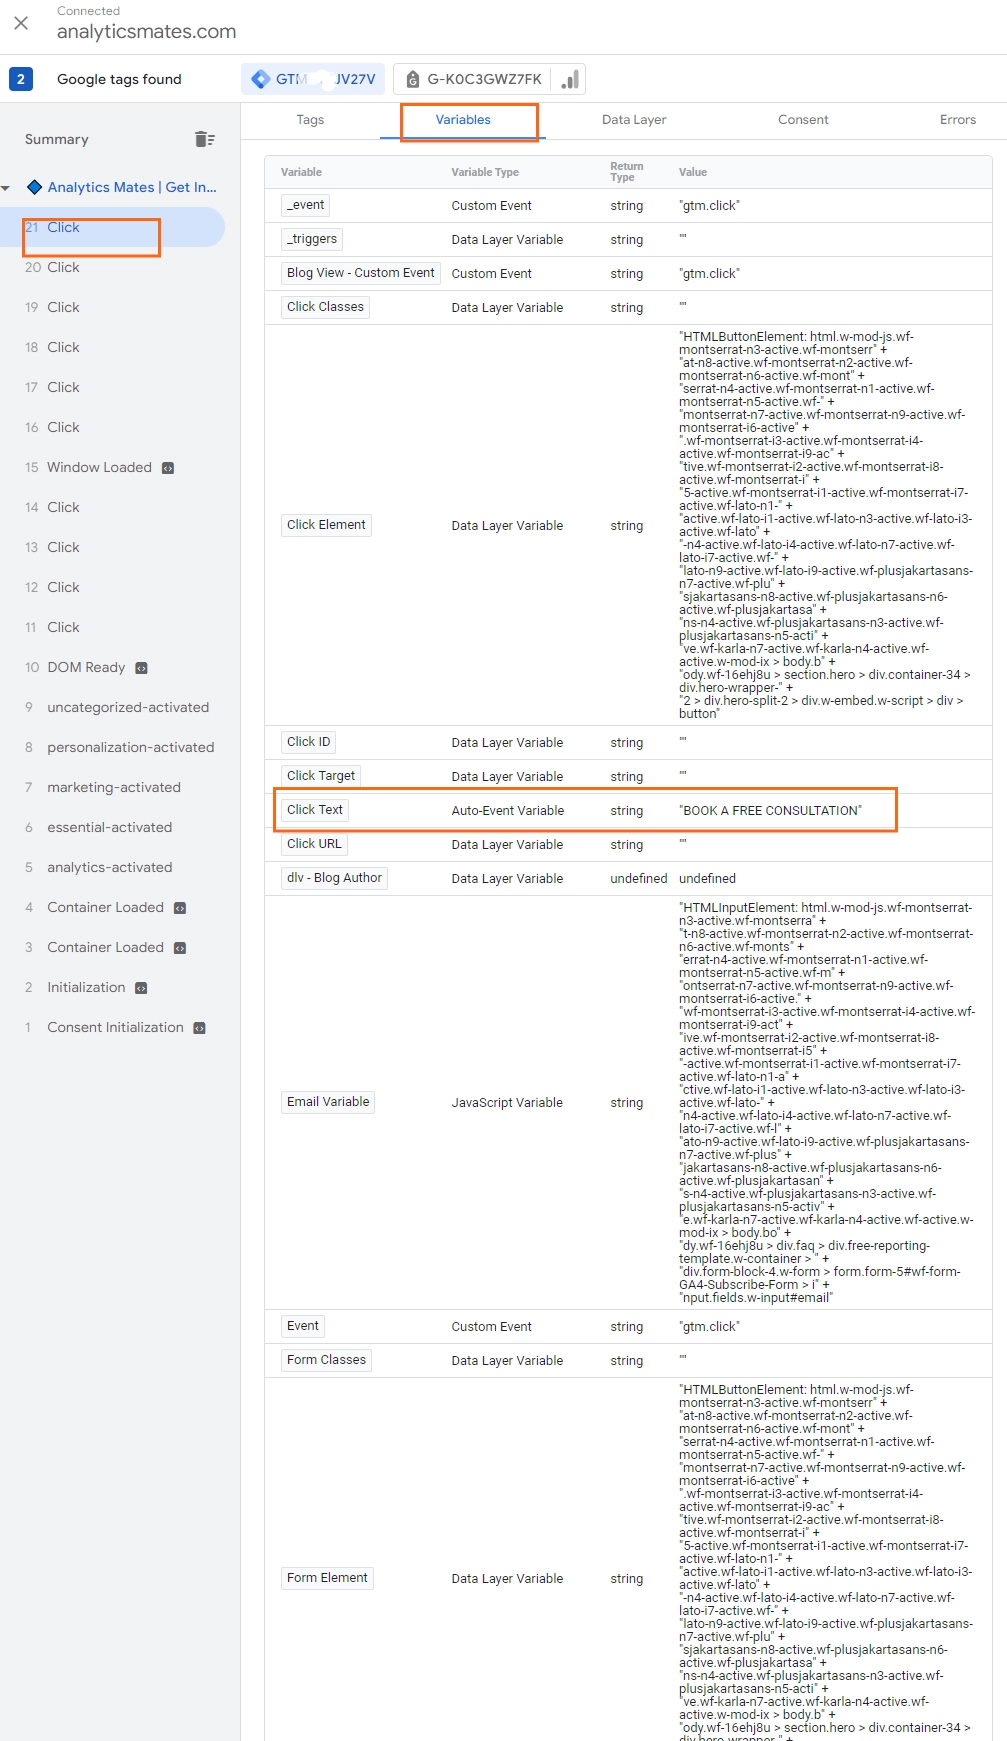
5. Once you clicked, go back to the tagassistant page and find the user interaction that corresponds to the clicked you made. In this example, it’s the “Click” button.
6. Now to get the variables for this CTA, click on the “Variables” tab. Now we need to get the variable value that we can use once we create an event tag in GTM. Here, we’re going to use the Click Text variable with the value “BOOK A FREE CONSULTATION”.
Actual GA4 GTM Event Tracking Creation
Now that we have the information that we need, the next step focuses on the actual tag implementation.
1. Go back to your GTM Account / workspace.
2. Under Tags, click New.

3. On the Tag creation page, give your tag a name
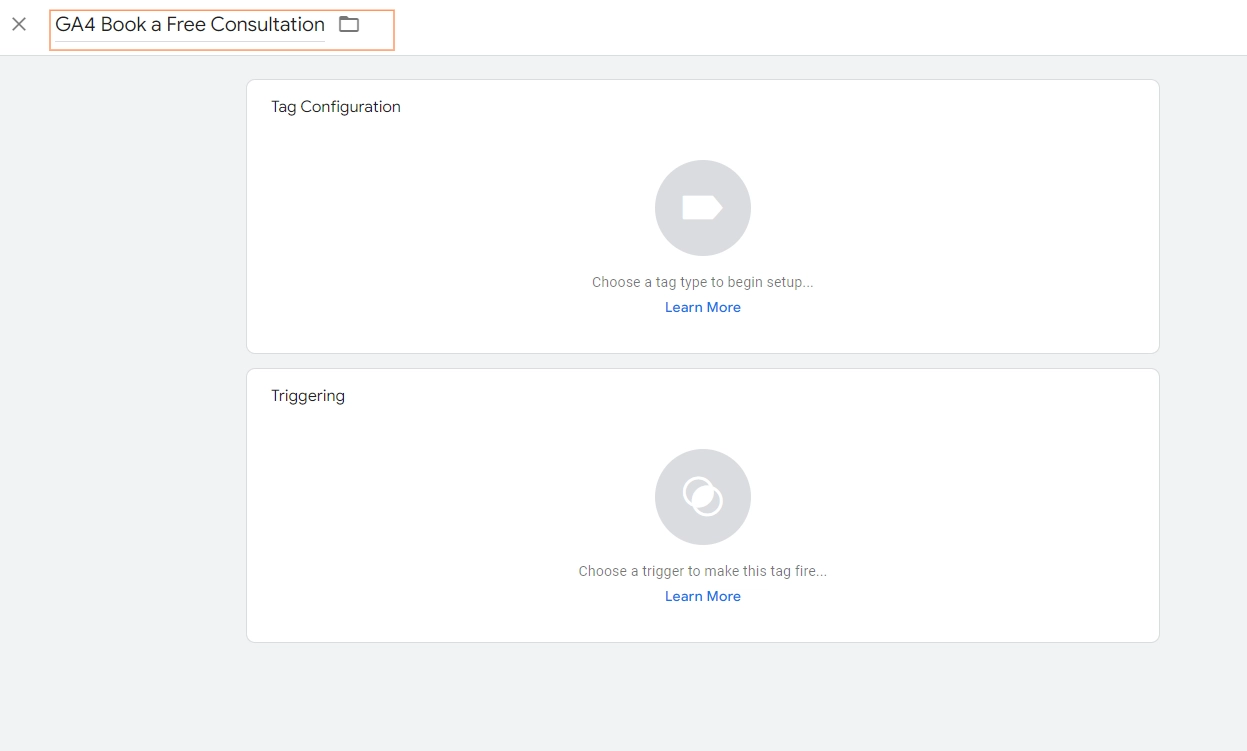
4. Click Tag Configuration > Google Analytics > Google Analytics: GA4 Event
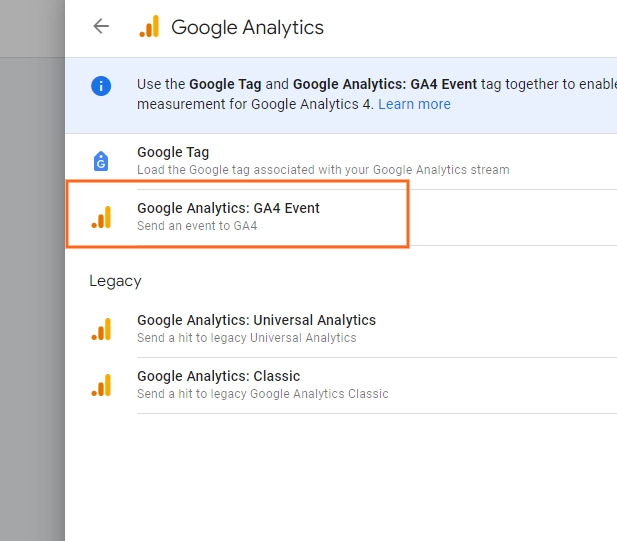
5. Type in your GA4 Measurement ID and the event name that you want to pass onto your GA4. In this example, we’re naming the event “Book a Free Consultation”.
6. Click the bottom section called “Triggering” so we can set up a trigger that will fire the event once a user interacts with your CTA.
7. Under Choose a trigger page, click the “+” icon on the top right corner of the page.
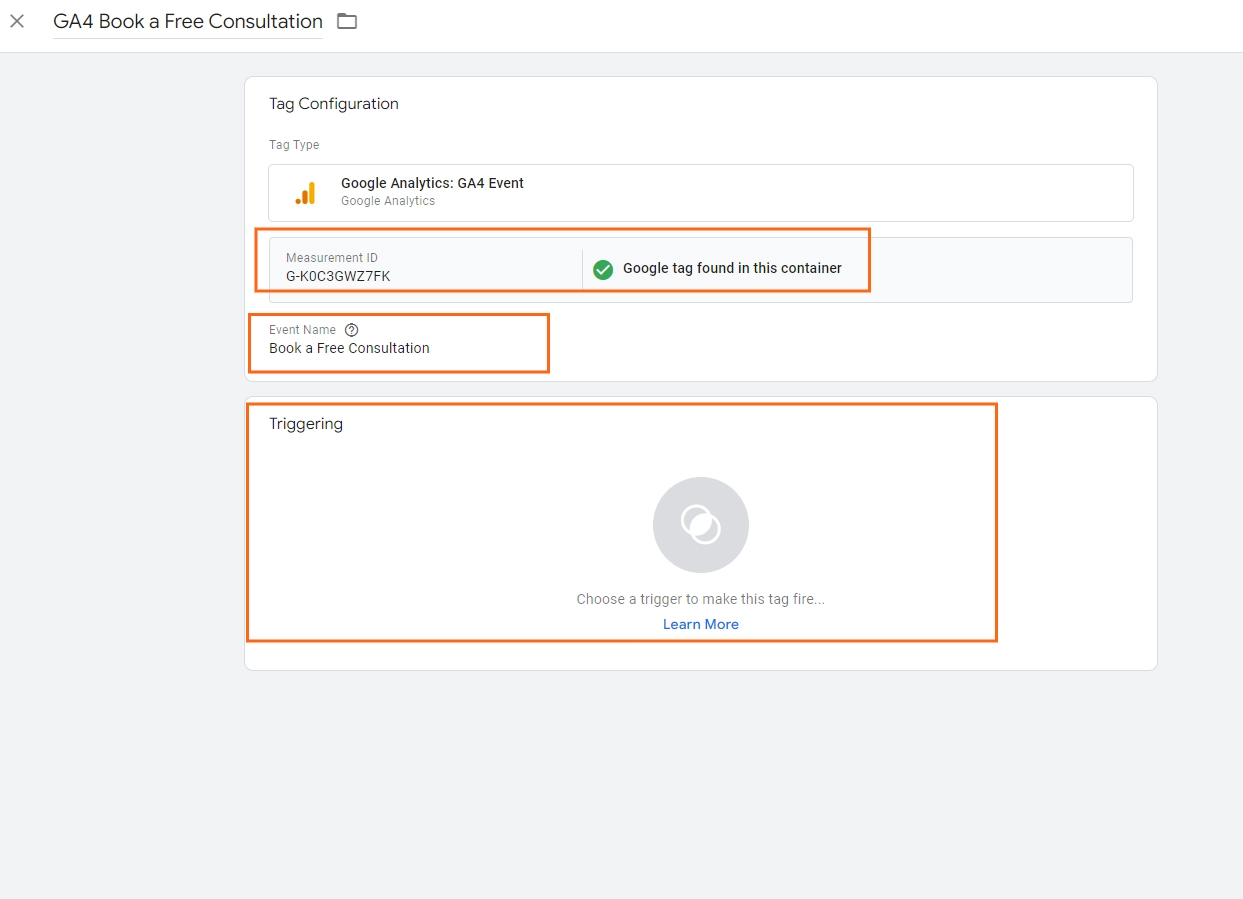
8. On the trigger creation page, same as the event, give your trigger a name. We’re using “Book a Free Consultation -trigger”. Click on the trigger configuration. Under Click, choose All Elements. The next part would be where we are going to use the Variable value that we got from the first section of this post.
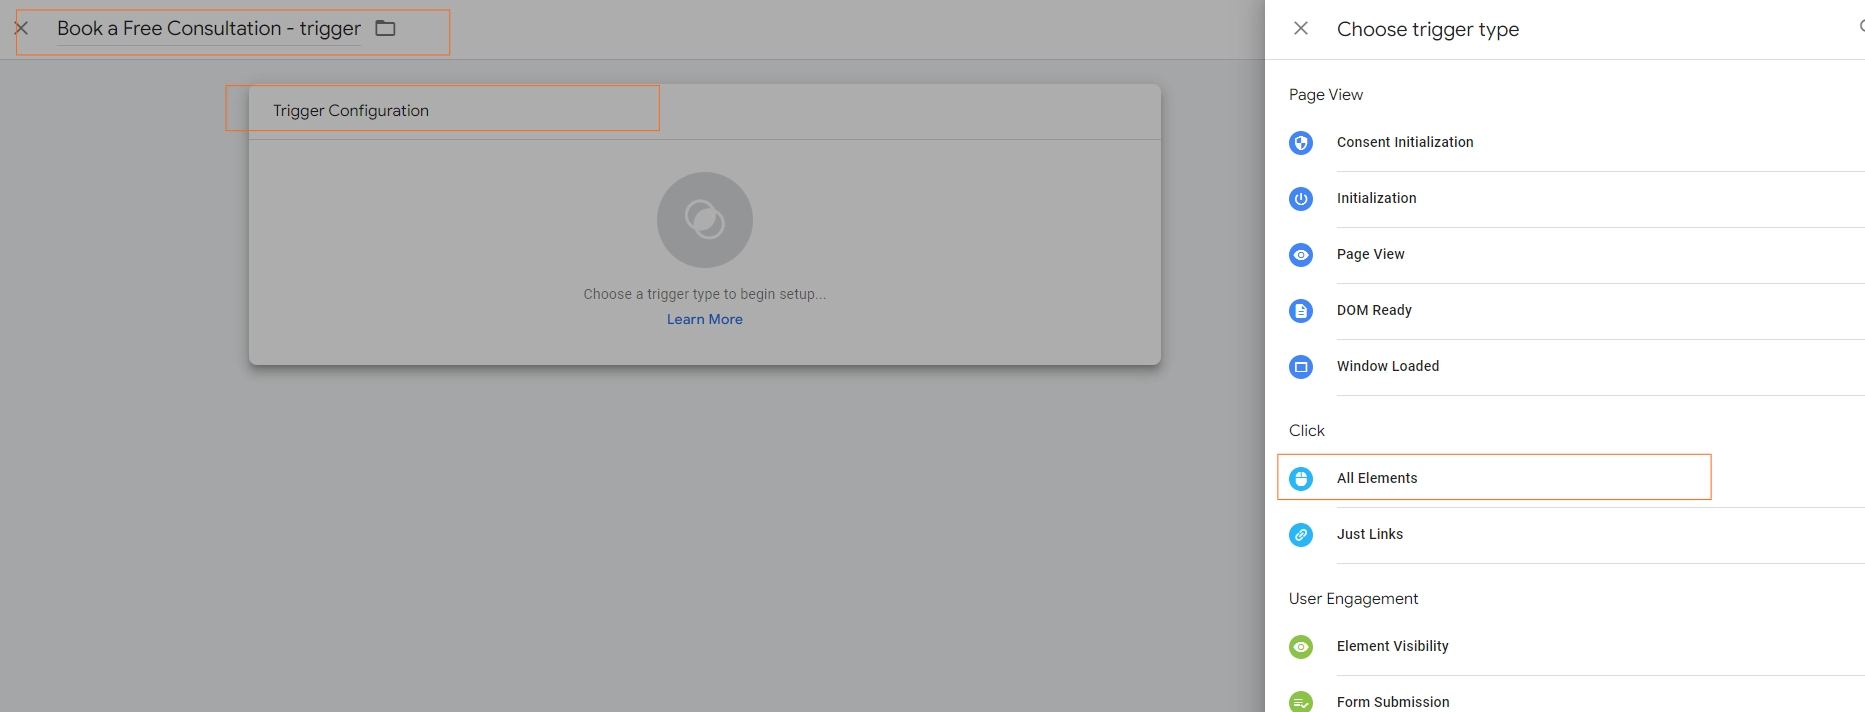
9. Click Some Clicks > Choose Click Text from the variable dropdown. Set the condition to contain the value “BOOK A FREE CONSULTATION” (without the quote). Then hit Save for both your newly created trigger and tag.

Now we are all set with the GA4 GTM event creation, the next thing we need to do is to test and confirm if it’s working.

Testing and debugging GA4 GTM Event
1. To test this, we need to follow the same procedure in the first section, from clicking the Preview button in GTM up until clicking the CTA button on your website.
But first we need to check if the newly created event tag is there.
2. In the tagassistant page > Tags tab. Under the Tags Not Fired not fired section, the event should be there. If so, then you can try to click the CTA.
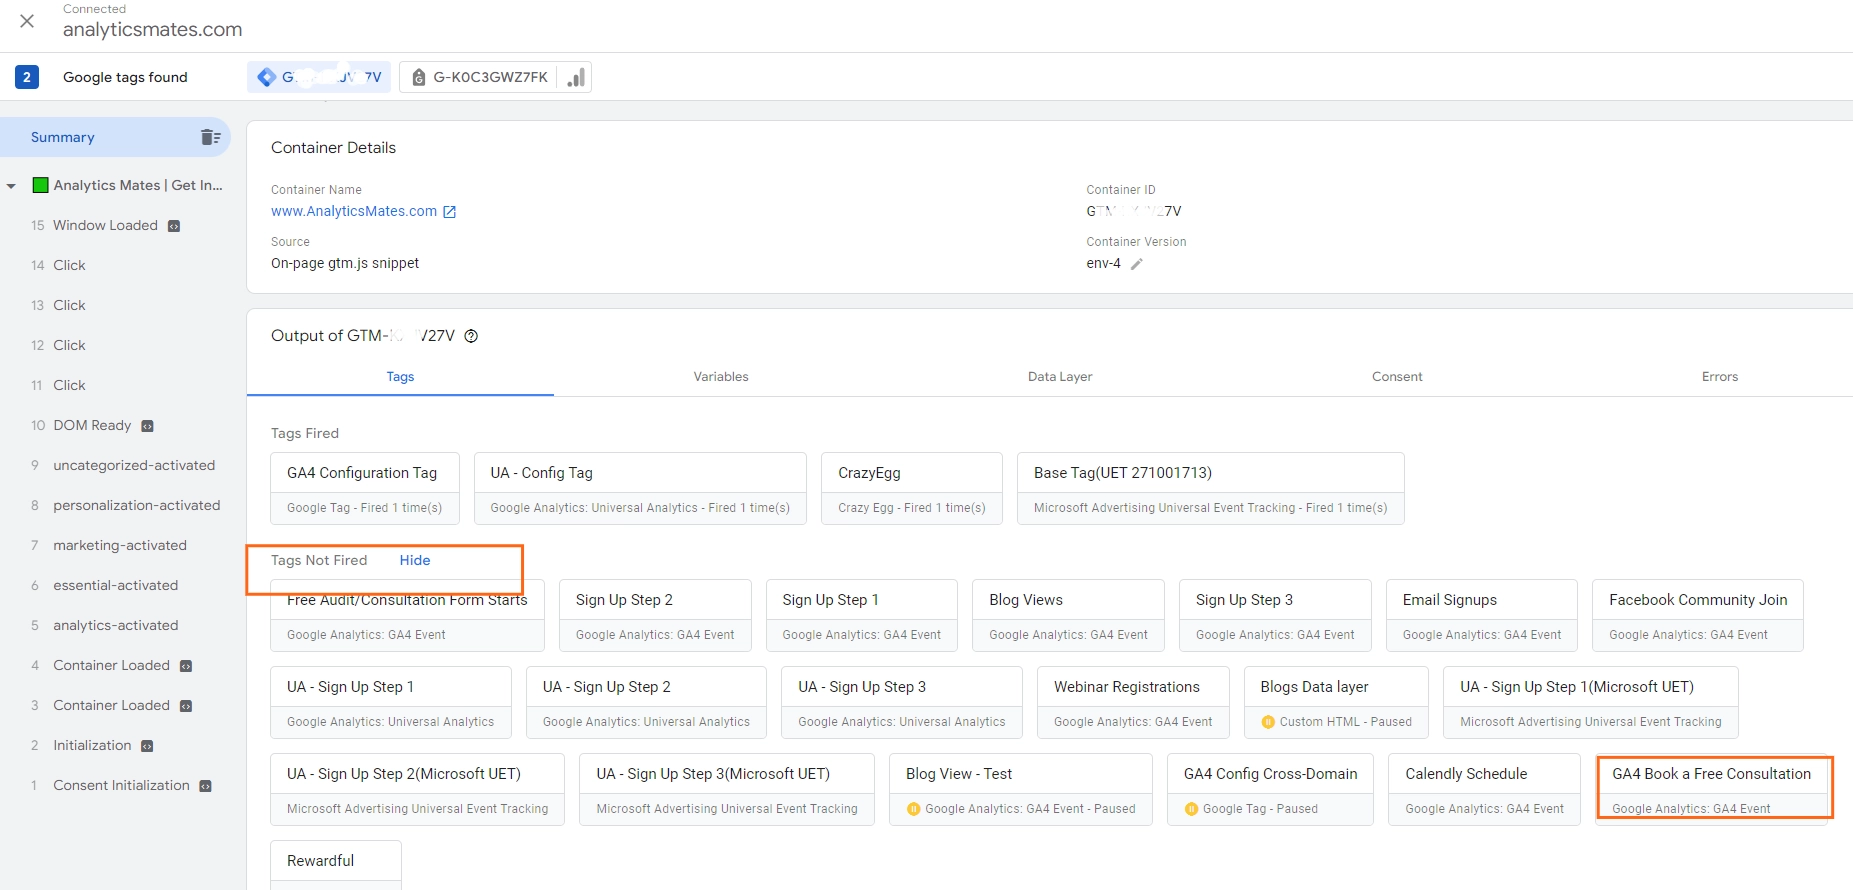
3. Once you’ve clicked the CTA, go back to the tagassitant page and you should be able to see the interaction and under the Tags tab the event has been fired.
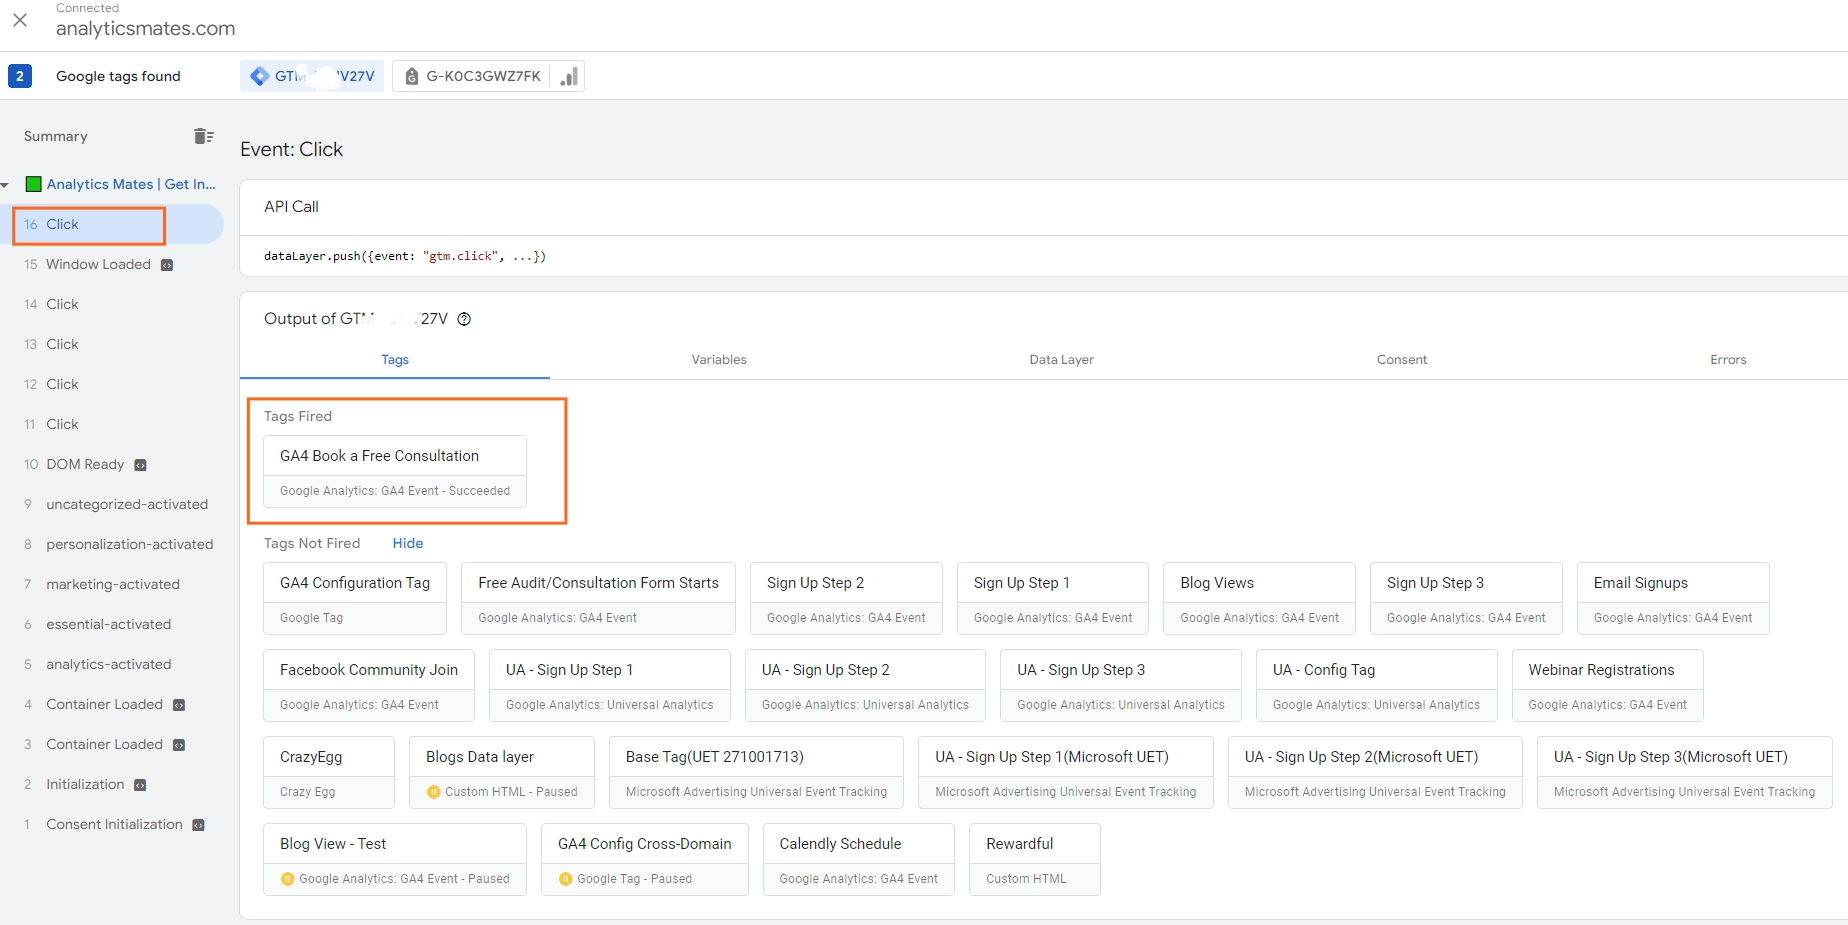
You can click the tag to view more details
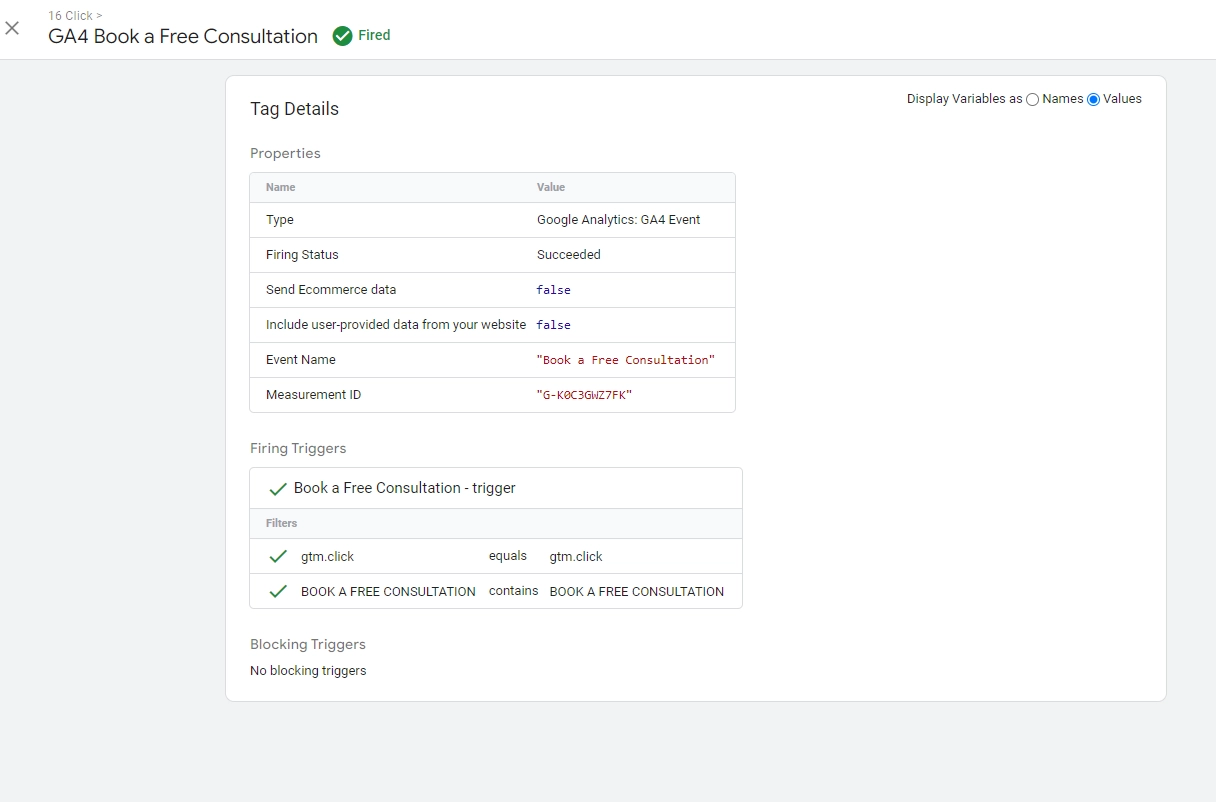
You should be all set, the data is passed onto your GA4. So the last thing that you need to do if you are already sure and if you want to track your CTA right away is to Publish the changes you made in GTM.
Publishing GA4 GTM Event
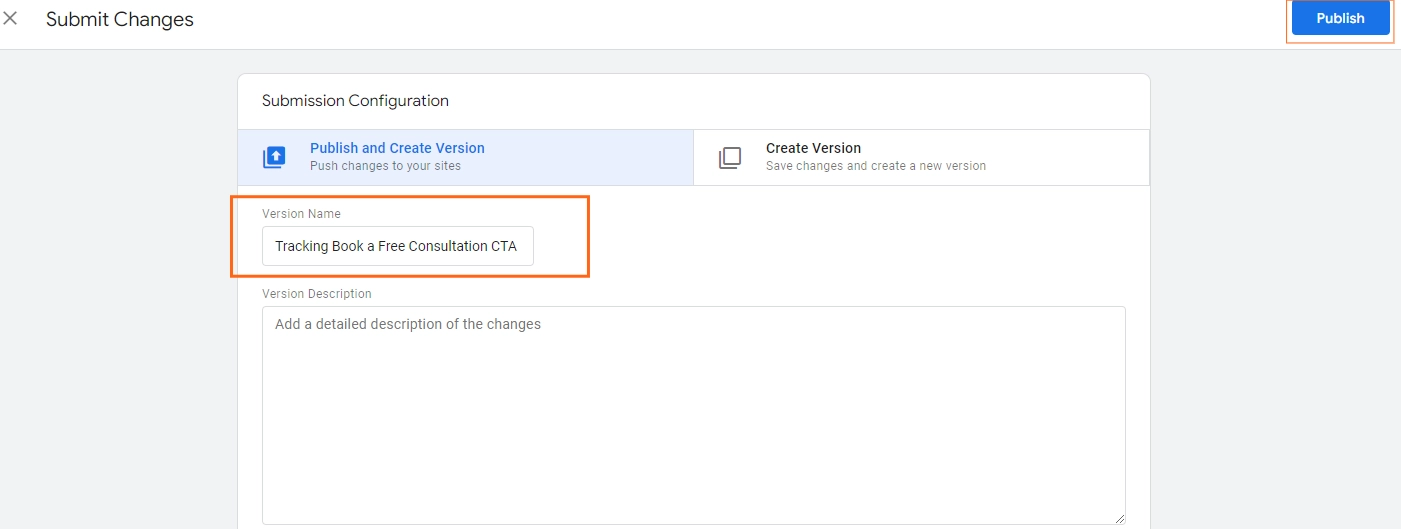
1. In your GTM account, at the top right corner of the page click Submit

2. You can add a Version name and also a brief description of your version and click Publish.
And there you have it! You're now equipped to apply this guide to track elements on your website effectively. Whether it's clicks, submissions, video plays, scrolls, custom events, or any other interaction, you can utilize these techniques. However, if you're seeking a more comprehensive approach to creating a GA4 GTM event tag using a data layer, we invite you to explore our detailed blog post on the topic. It provides in-depth insights and additional strategies to further enhance your tracking capabilities. Happy tracking!
Frequently Asked Questions about GA4 GTM Event Creation
What are the security considerations when using GTM?
It's essential to properly configure your tags and triggers to ensure you're not sending sensitive data unintentionally. Make sure you understand the data you're collecting and follow best practices for data security.
Do I need coding knowledge to use GTM event creation?
While basic coding knowledge can be helpful, it's not essential for setting up most basic events. GTM provides a user-friendly interface and pre-built templates for common tracking scenarios.
Are there any advanced features I should know about?
Yes! You’ve already explored variables, you can explore custom triggers, and dataLayer manipulation (which we’ve already shared a link as well on this post).
Final Word
In summary, learning how to create GA4 GTM events can help you tackle various challenges. It lets you understand how users behave, track how effective your campaigns are, personalize user experiences, and make sure you're following data privacy rules. Plus, you won't have to rely on developers as much for tracking changes, so you can test updates faster. This leads to better data quality and consistency, which is important for making good decisions. Whether you should learn about GTM event creation depends on what you need and want to achieve. If you're facing any of the problems mentioned earlier, it's worth giving this tool a shot.
Thank you for reading!


%20Data%20in%20GA4.webp)


