


If you're currently using an eCommerce platform like Shopify, which is a great tool for online stores, you’re likely benefiting from insights into your store's performance. However, there are still limitations and data gaps that can hinder a complete understanding of your business. Google Analytics 4 (GA4) and Google Tag Manager (GTM) can fill in these gaps, offering a deeper understanding of your eCommerce store. While this might sound technical or daunting, it doesn't have to be. This blog post is here to help you understand the essentials and prepare you to leverage GA4 for enhanced eCommerce tracking. It’s one of the best steps you can take for your eCommerce store, and we're here to guide you every step of the way. Let’s dive in!
eCommerce and Its Benefits
First, let’s define what an eCommerce website or app is. Essentially, it’s an online platform for selling products or offering services. Think of it as the digital equivalent of walking into a physical store: you browse for specific products, add them to your cart, and make a purchase at the checkout. The only difference is that you’re doing it all online.
While inventory and sales audits are useful, the true benefit of eCommerce measurement is gaining a deeper understanding of what users are seeking in your products or services. For instance, if you run a clothing store, you can track which colors, sizes, garments, styles, and other product specifications are most viewed, added to carts, and purchased by customers online. This valuable insight enables you to make informed decisions about which campaigns to run, what promotions to offer, and which customer segments to focus on to boost sales volume. Ultimately, this data-driven approach can help you increase your sales and product revenue.
eCommerce Reporting in GA4
eCommerce purchases report is a prebuilt report for users to check on their eCommerce measurement performance.
- Sign in to your Google Analytics account
- Go to Reports → Monetization → Ecommerce purchase report

The eCommerce Setup
There are eCommerce Content Management System (CMS) tools that offer pre-built tracking for eCommerce measurement. Popular platforms include Shopify, Magento, and WooCommerce (WordPress). By leveraging these platforms, you can easily start measuring and optimizing your eCommerce performance in GA4.
You can check out these documentations to learn more about the integration:
While these platforms offer an easy setup, they provide only basic eCommerce metrics and may lack the flexibility for custom data points. If you want to go beyond the standard tracking provided by these website builders, consider implementing custom tracking for your eCommerce site, which we'll discuss in the next section.
*If you're unsure about how to proceed, you’ll definitely want to share this with your developer.
Here are some resources provided by Google Analytics that your developers can use to set up custom events based on your specific needs:
- Ecommerce events on a website with gtag.js
- Ecommerce events on a website with Google Tag Manager
- Ecommerce events on an app with the Google Analytics for Firebase SDK
eCommerce events on a website with Google Tag Manager
In the next section, we’ll focus on setting up using Google Tag Manager, as it offers greater flexibility, centralized management, and faster implementation. While the other two approaches are more technical and complex, they can still provide significant value depending on your business requirements.
Before we begin we need to ensure that you’ve already had the following setup.
- Google Analytics 4 (GA4) Property - This is where your eCommerce data will be collected and analyzed.
- Google Tag Manager Container - The platform where you'll create and manage your tags, triggers, and variables.
- Website or App Code - Access to your website or app code is necessary to implement the data layer. .
- eCommerce Data - Information about products, transactions, and user interactions.
What is a Data Layer for eCommerce Tracking?
We won’t delve into the details of the Data Layer here, but if you want to learn more, you can start by visiting our previous blog post on the topic.
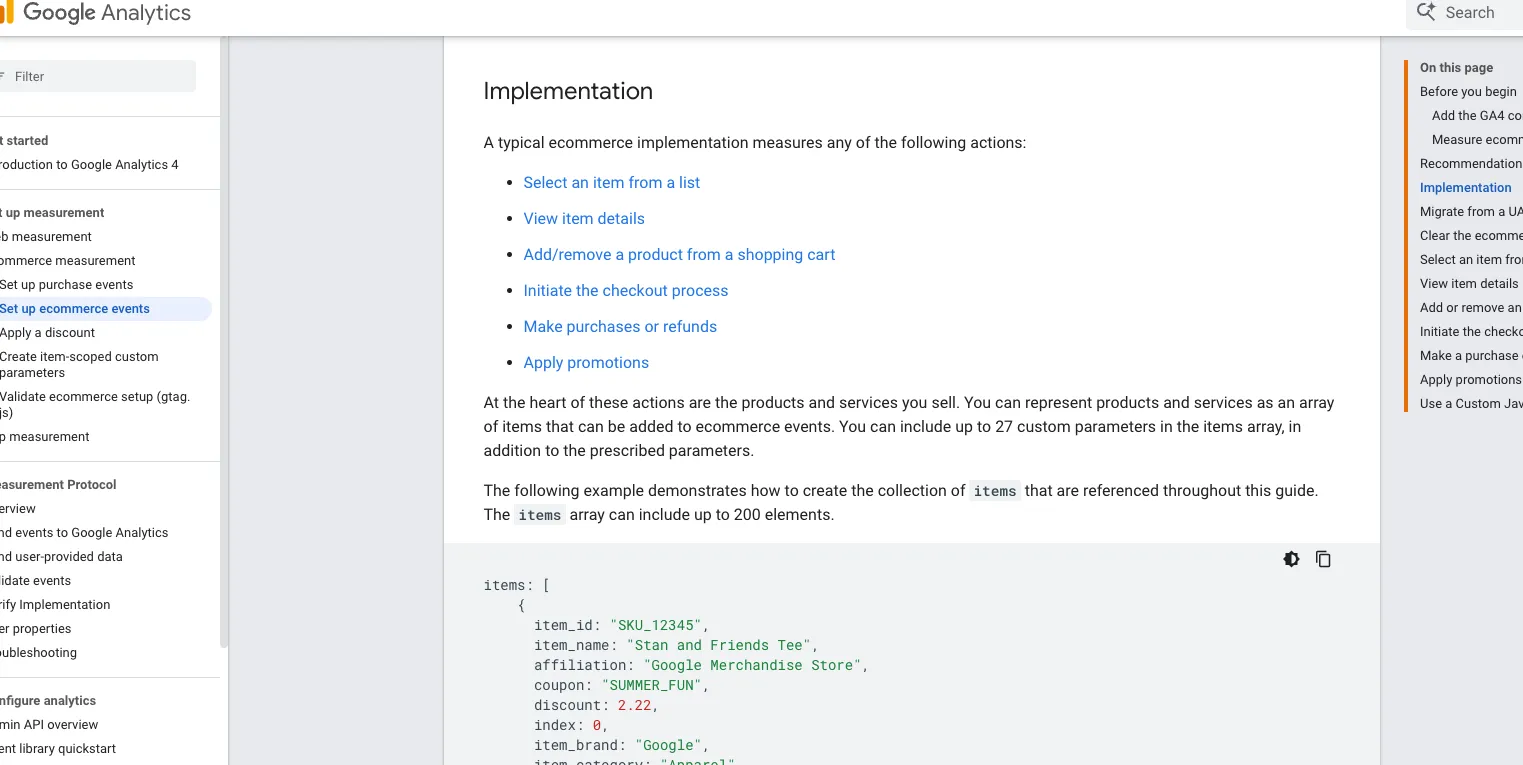
Next, familiarize yourself with Google's Measure eCommerce documentation. This resource provides detailed information about eCommerce implementation, including samples and formats of the exact DataLayer codes to use.
Once you think you’re ready about what data layers to use and include, the next step is to deploy these programs/codes on your website.
How to Implement a Data Layer on Your Website?
There are several methods, but here are the most common and widely used:
- Implement the Data Layer manually on your website’s backend. If you’re not familiar with how to do this, we recommend involving your web development team.
- The easiest method is to leverage your shop system (Shopify, Magento, WooCommerce) and install available plugins to implement the Data Layer. But this may not be available for all websites or shop systems.
After setting this up, be sure to verify and debug the Data Layer codes to ensure they’ve been deployed correctly. For more information on this process, refer to this section from the blog post shared above.
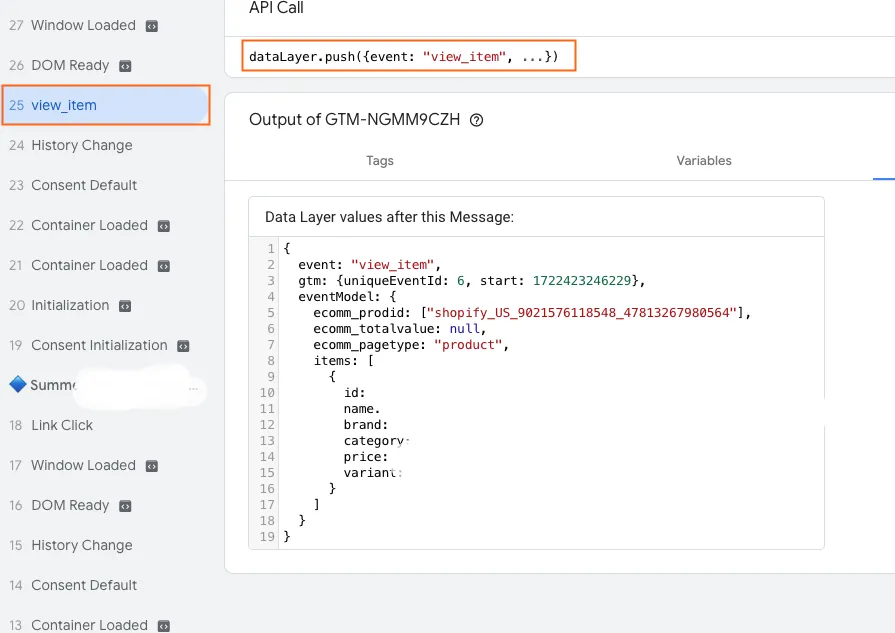
To check this in GTM, just follow the same steps here just try to trigger an eCommerce action like for example view_item. And you should be able to see the data layer information under the Data Layer tab.

Once we’ve verified that the data layer codes have been deployed correctly, we’re ready to send the eCommerce data to GA4.
Passing eCommerce Data to GA4
In Google Tag Manager under your account, make sure you’ve already set up a GA4 configuration tag.
Now, we’re ready to create a New tag.


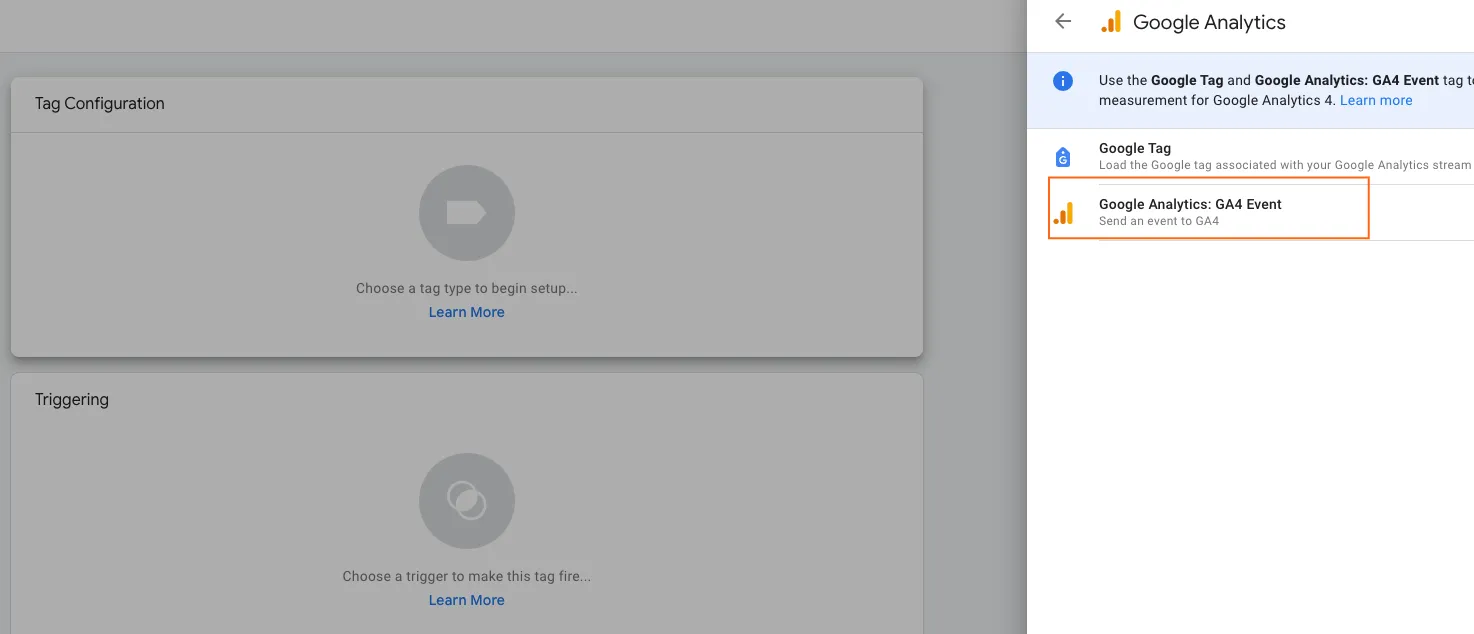
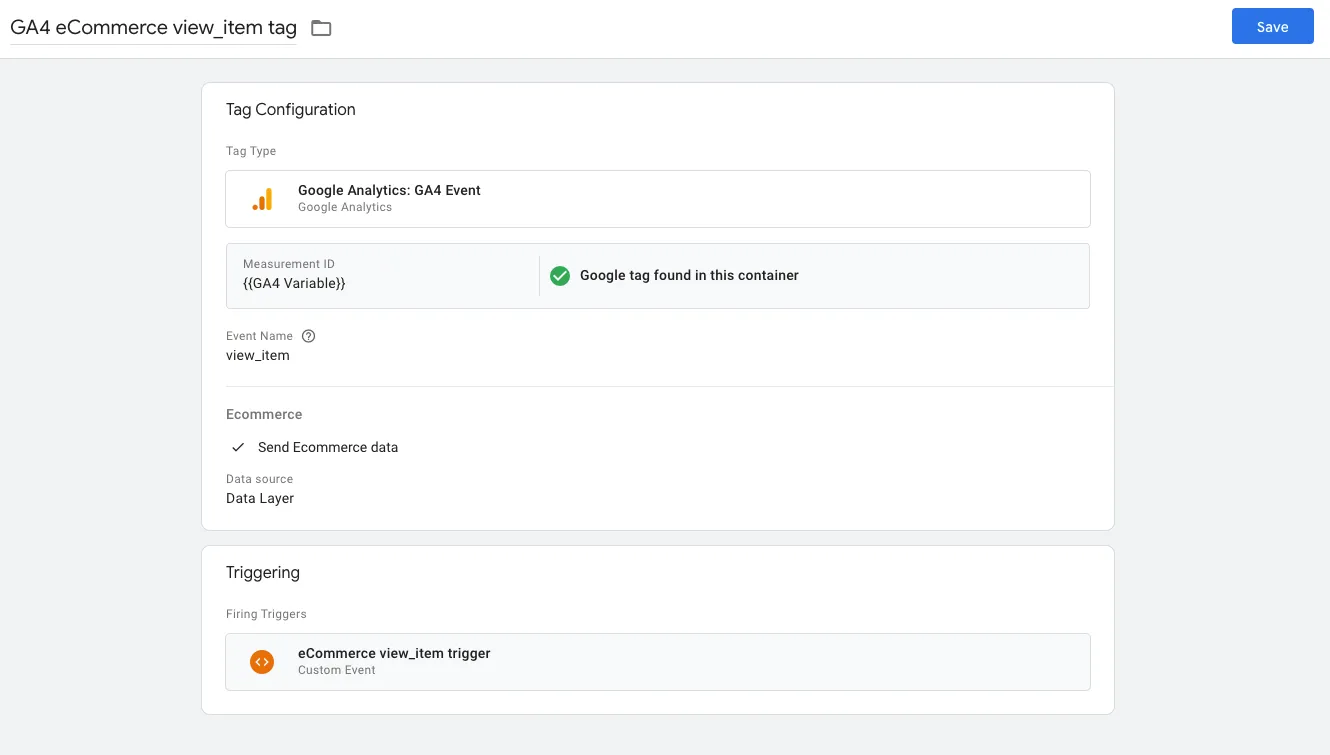
Click on Tag Configuration → Google Analytics → Google Analytics: GA4 Event.
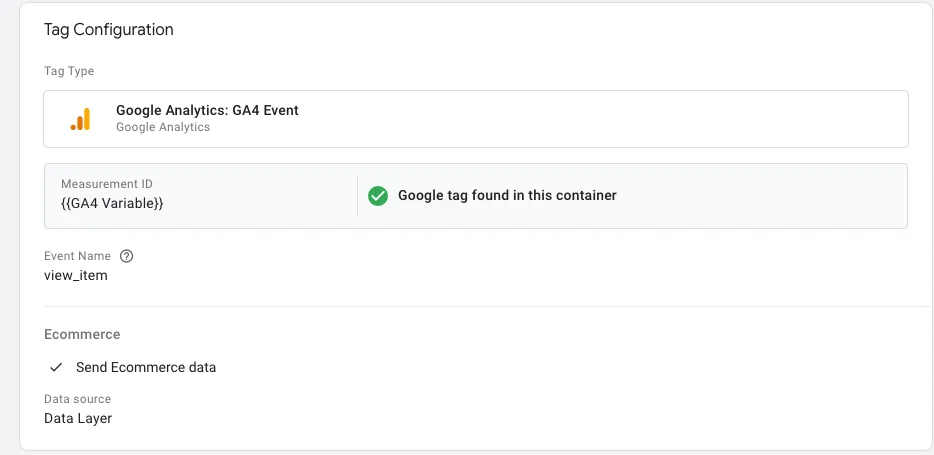
1. On the Tag Configuration section, add in your Measurement ID.
2. Next, you can refer to these GA4 recommended events for online sales. We’ll start with view_item on this example.
3. Lastly, click on More Settings → click the checkbox to Send E-commerce data.
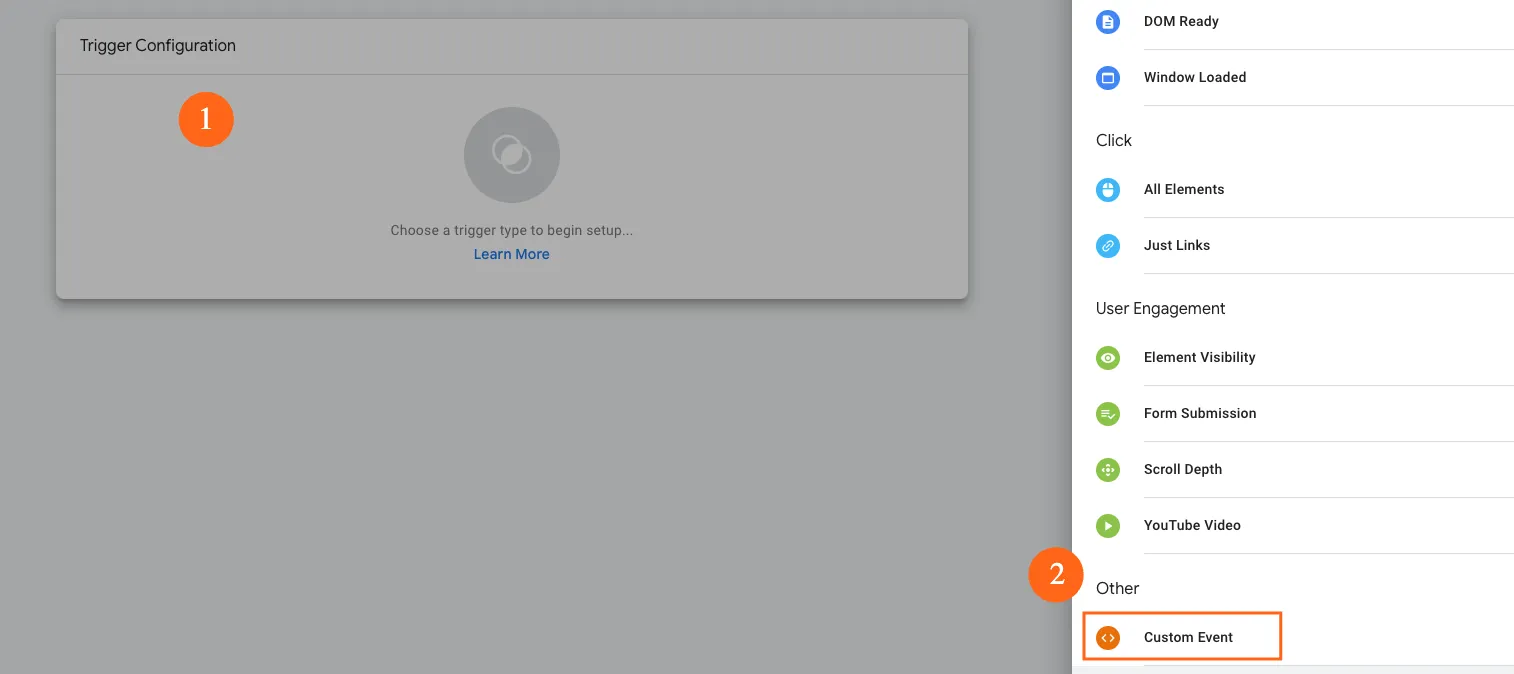
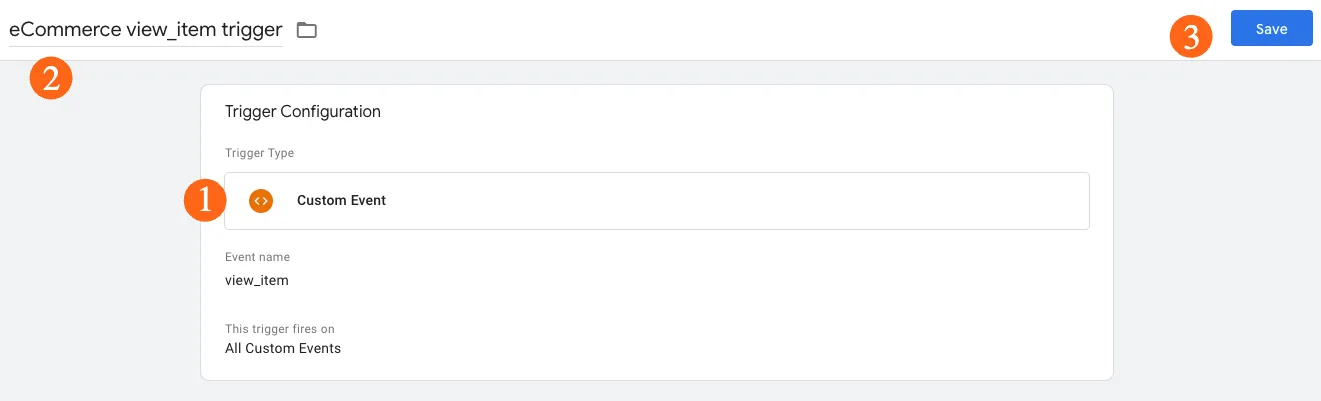
4. Next, we have to add an event trigger.

5. Click “+” on the upper right corner of the page.

6. Select Trigger Configuration → choose Custom Event
7. For the event name → view_item, name the trigger and click Save.
8. Name your event tag and click Save.
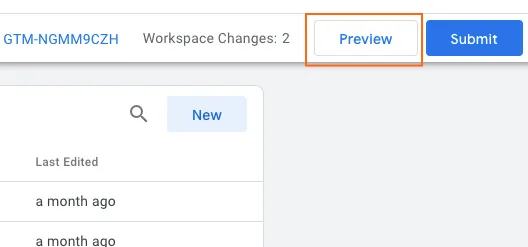
Now, it’s time to Preview our tag.
To test the GTM event, view a specific product on your website. You should be able to see the tag fire in the Tag Assistant.
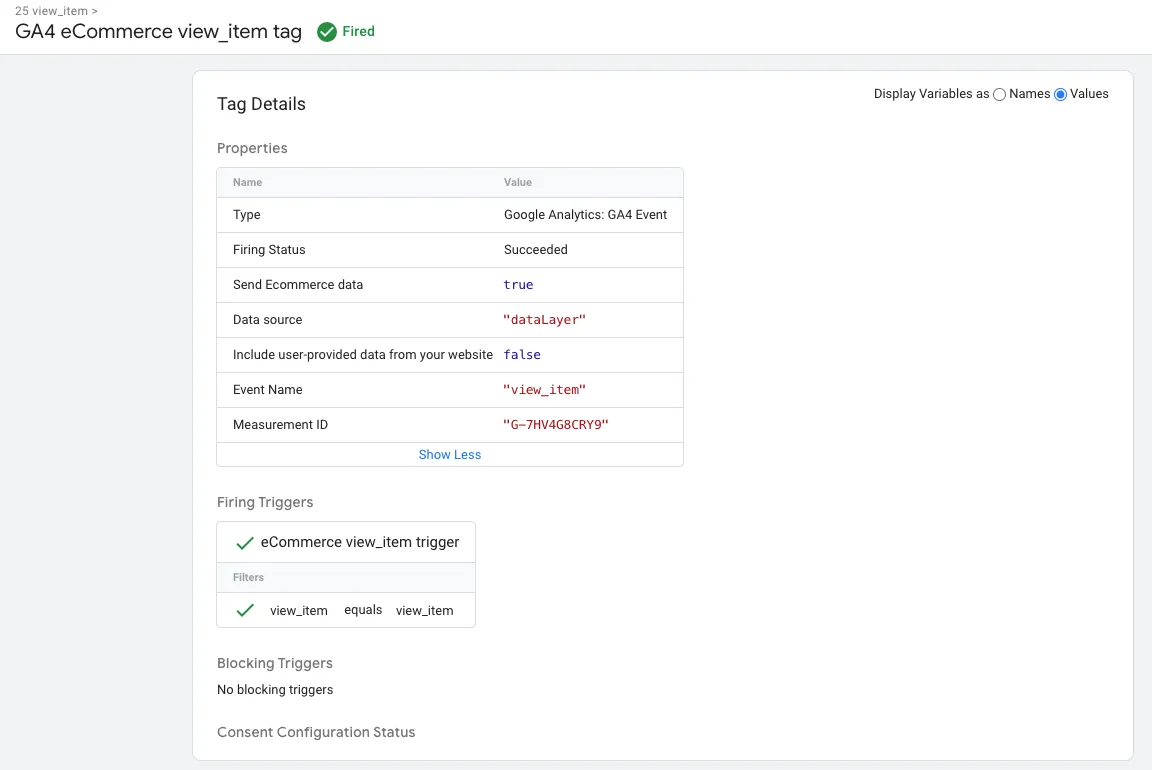
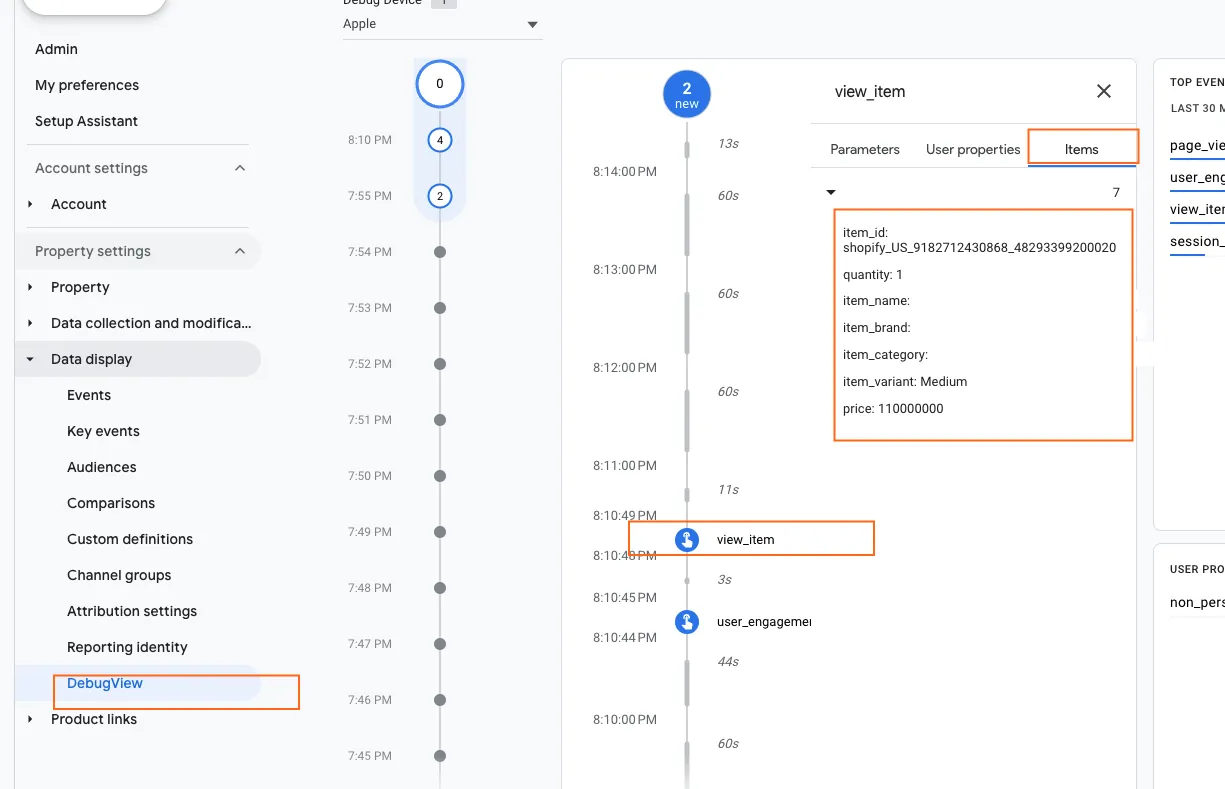
To ensure the data is correctly sent to your GA4 property, go to your Google Analytics account and navigate to DebugView. There, you should see the view_item event along with the corresponding data from the Data Layer.
Great! Now that you've confirmed the data is being correctly passed to your GA4 account, you can proceed with verifying the rest of your eCommerce events, such as add-to-cart, checkout, and purchase, which are part of your funnel report.
Keep in mind that GA4 may take 24 to 48 hours to process your eCommerce data after implementation. Once the data appears in your GA4 account, you can begin analyzing it and creating new reports.
FAQs
Why should I use Google Tag Manager (GTM) for eCommerce tracking?
GTM allows you to manage and deploy tracking code without needing to modify website code. This makes it easier to implement and update tracking, reduces errors, and saves time.
Why is it Important for eCommerce Tracking?
A data layer is a JavaScript object that stores dynamic data on a webpage. In eCommerce, it's crucial for collecting and organizing product information, user actions, and order details. This centralized data repository ensures accurate and efficient tracking, making it easier to implement and manage tags in Google Tag Manager (GTM).
Can I use GA4 to attribute eCommerce conversions to marketing channels?
Yes, GA4 offers attribution modeling to understand the impact of different marketing channels on conversions, allowing for data-driven marketing decisions.
What are common issues with eCommerce tracking?
- Incorrect parameter values
- Missing or duplicate events
- Tag firing issues
- Data layer inconsistencies
Final Word
Although it may seem technical, you have access to free resources and tools that can make tracking your eCommerce store using this method quite manageable. Here's a quick overview of the process to keep in mind:
- Determine the key data points you want to track.
- Implement the Data Layer on your site to capture these data points.
- Use Google Tag Manager to retrieve the data from the Data Layer.
- Pass the data to Google Analytics 4 for analysis.
By following these steps, you can set up a comprehensive eCommerce tracking system that provides valuable insights into your store's performance. We hope you find the information in this post helpful and that it empowers you to enhance your eCommerce analytics.
Next steps: Here are some additional blog posts that can help you expand your knowledge and boost your eCommerce success.
- Diving Deeper into eCommerce + Lead Generation Key Events
- How to Use GA4 Explorations Report for E-commerce Analysis
- How to Use GA4 Explorations Report for E-commerce Analysis
Thanks for reading!
We're always looking for ways to improve our Google Analytics 4 blog content. Please share your feedback so we can make it even better.
See Article Images


